
Are you a photographer who uses a Canon camera? Do you also have a Mac computer? If so, you may be wondering how to connect the two devices. Getting everything set up correctly can be tricky, but this guide will walk you through the process step-by-step.
We’ll show you how to transfer photos from your camera to your computer and tips on keeping your images organized on your hard drive.
So whether you’re just starting or have been shooting photos for years, this is a guide on how to connect Canon camera to Mac is for you!

How to Connect Canon Camera to Mac?
There are three standard methods of connecting your camera to your Mac. The first uses a USB cable, the second uses an SD card reader, and the third uses Wi-Fi.
Connect Canon Camera to Mac Using USB Cable
USB (Universal Serial Bus) is a standard that defines the cables, connectors and used for communication, powering, and data transfer between computers and electronic devices.
Many modern cameras can be connected to a computer using a USB cable, which allows the transfer of photos and videos from the camera to the computer. In order to connect a camera to a computer using a USB cable, the photographer will need to find the USB port on their camera and connect it to the USB slot on their computer using a USB cable.
Once the connection is made, the computer should automatically recognize the camera and prompt the photographer to download the photos and videos from the camera.
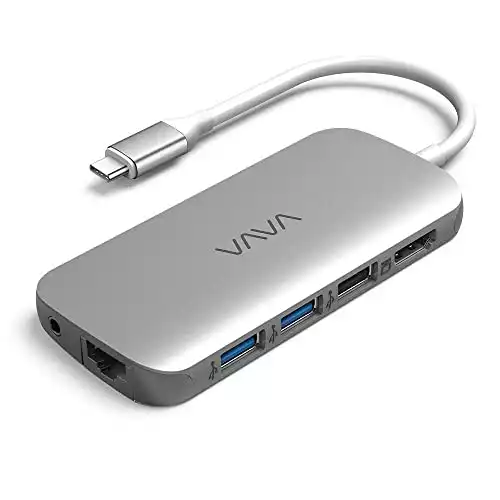
If you’re using a MacBook Air or MacBook Pro, you’ll need a USB-C cable to plug directly into the side of the computer. Or use an adapter dongle that provides different port options. While there are many options of dongles for your Mac, we’ve found that this one works great and also works with newer iPads as well:
Connect Canon Camera to Mac Using Memory Card
Most digital cameras use SD cards to store photos. To transfer these photos to your Mac, you will need an SD card reader. This is a small device that plugs into your computer’s USB port and allows it to read the SD card.
Taking the memory card from your camera and plugging it into your Mac is a quick and easy way to transfer photos. Here are the steps:
- First, locate the sd card in your camera. It is typically in a side compartment and is about the size of a fingertip.
- Next, insert the sd card into an sd card reader. This is a small, rectangular device that is typically USB-compatible.
- Once the sd card is inserted into the sd card reader, plug the reader into an available USB port on your Mac computer.
- After a few moments, your computer should recognize the sd card and prompt you to import the photos. If you have not imported photos from your camera before, you may need to select a location for the photos to be stored on your computer before proceeding.
- Finally, follow the prompts on your screen to complete the import process. Once the importing is complete, you can eject the sd card from the reader and return it to your camera.
Depending on your Mac, it might already have a card reader built-in, no need for an adapter that plugs into a USB port. For example, the newest MacBook 14″, 16″, and MacStudio have SD card readers built-in.
Connect Canon Camera to Mac Wirelessly
In order to connect your Canon camera to your Mac using a wireless or WiFi connection, you’ll need to adjust your network settings and ensure that your camera is compatible with the WiFi network. Most modern Canon cameras are compatible with WiFi, but older models may not be.
Once you’ve confirm that your camera is compatible, you’ll need to connect it to the WiFi network. The process for doing this will vary depending on your camera model, but typically involves accessing the menu system and selecting the join network option.
Once your camera is connected to the network, you can then use the Canon EOS Utility software to transfer images from your camera to your computer. The EOS Utility software is typically included with Canon cameras, but can also be downloaded from the Canon website.
With the EOS Utility software installed on your computer, you can simply connect your camera to the network and then launch the software in order to transfer files. Follow these steps and you’ll be able to easily transfer files from your Canon camera to your Mac using a wireless or WiFi connection.
Here’s a video showing how to wirelessly connect a Canon camera to a Mac.
Software to Transfer Photos to Your Mac
Adobe Lightroom
Adobe Lightroom is a photo editing and management software photographers love because it is easy to use and allows them to do a lot of post-processing work on their images. It’s also a great way to keep your photos organized and easy to find.
When you connect your camera, you’ll be prompted to choose how you want to import your photos.
We recommend choosing the option to “copy as DNG,” which will convert your RAW files into a digital negative format compatible with Lightroom and other software programs.
Popular Features of Lightroom:
- Easily transfer photos from your camera to your computer.
- Organize your photos in a single, easy-to-use interface.
- Enjoy editing your photos and creating beautiful memories.
Adobe Bridge
Adobe Bridge is another software program that photographersphotographers often use often use. It is a free program that allows you to view, organize, and edit your photos.
Some of the features that Adobe Bridge offers include:
- Importing photos from your camera to your computer.
- Easily viewing and organizing your photos.
- Editing your photos with a variety of tools.
Apple Photos App
The Apple Photos app comes pre-installed on all Mac computers. It offers a variety of features for photographers, including the ability to import photos from your camera, view and organize them, and edit them with ease.
To import photos into the Apple Photos app on Mac, you’ll need first to connect your camera to your computer using one of the methods described above.
Once your camera is connected, you’ll be prompted to choose how you want to import your photos.
Once the import process is complete, they’ll be automatically synced with iCloud and available in the Apple Photos app on all your Apple devices. From there, you can view, edit, and share them with ease.
What is the Best Way to Organize Photos?
Photos are important because they help us remember the good times we have. It is important to organize them so we can find them easily and remember what they are of.
Here are some common organization strategies you might consider after you have imported your photos onto your computer:
Organize Photos By Date
If you take a lot of photos, organizing them by the date they were taken can be helpful. This is especially true if you want to remember when a certain event took place.
You can create folders for each year and then subfolders for each month.
Organize Photos By Location
Another way to organize your photos is by the location where they were taken.
If you travel a lot or take pictures in different places, this can be a great way to keep track of all your memories. You can create folders for each country, state, or city you have visited.
Organize Photos By Event
Organizing your photos by event is a great way to keep track of special occasions.
You can create folders for birthdays, holidays, vacations, and anything else you want to remember. This can be a great way to relive happy memories.
Organize Photos Using a Combination of all Three
Organizing photos by date might be to vague because it’ll be difficult to remember. By location or event might get confusing if you have traditions of visiting the same place or celebrating the same events. You might consider creating a folder for the year, and then sub-folders that have the location or the event.
How to use Canon Camera as a webcam?
Because remote work jumped in popularity over the last couple of years, you’re probably joining many virtual calls. While your Canon camera might not be your typical webcam, there are still ways to make it work.
With the right software and hardware, you can use your Canon camera as a high-quality webcam for video calls!
Read this guide on how to use a DSLR as a webcam. Also, you can read our review on the Top 5 webcam for Mac.
Conclusion
Importing photos from a Canon camera to a Mac computer can be a bit of a hassle, but there are a few ways to make it work. You can use a USB cable, SD Card Reader (our preferred method), or wireless connection.
The best way to organize photos is by date, location, or event, but you can also use a combination of all three. Find a way that works best for you, and is easy to quickly identify photos as time passes and we forget specifics about the photos we are taking.
You can also use your Canon camera as a webcam for video calls if you’re looking for high quality video feed.
On Camera Guider, you can find all the latest and best information on photography gear and accessories.
Related Posts: